Android Lists: ListActivity and ListView I – Basic Usage
 Recently I upgraded my HTC Diamond to a new, shiny HTC EVO 4G, even though Milwaukee doesn’t yet have 4G coverage. The big difference is that instead of running Windows Mobile 6.5, the EVO is running Android 2.2. Being the programmer that I am, I needed to try out creating an application for it to see how it compared to my (less than ideal) Windows Mobile development experience. The first thing that I wanted to check out was the some of the different layouts, and I began my journey by looking into ListActivity…
The Android ListActivity makes it simple to display a list of items in your application. If the main purpose of a screen (Activity) in your mobile application is to present a list of choices or content to the user, use ListActivity instead of Activity. If all you want to do is display a list to the user and nothing more, you don’t even need to create a layout definition for the activity. The ListActivity has a default layout that provides a ListView for you. However, if you wish to customize the way your ListActivity looks, the single required element in your layout definition is an object with an id of @android:id/list.
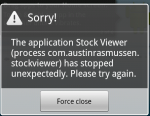
If your layout doesn’t have an object with an id of @android:id/list when you go to launch your application, you’ll be greeted with a “The application … has stopped unexpectedly. Please try again.”. Looking at the debug output, you can see that the exception raised states “Your content must have a ListView whose id attribute is ‘android.R.id.list'”.
Let’s say you wanted to create an application that would list all of the stock ticker symbols that you have invested in. You could create a simple layout definition file that looks something like this:
<?xml version="1.0" encoding="utf-8"?>
<LinearLayout xmlns:android="http://schemas.android.com/apk/res/android"
    android:orientation="vertical"
    android:layout_width="fill_parent"
    android:layout_height="fill_parent"
    >
<ListView
    android:layout_width="fill_parent"
    android:layout_height="wrap_content"
    android:id="@android:id/list"
    />
</LinearLayout>
package com.austinrasmussen.stockviewer;

import android.app.ListActivity;
import android.os.Bundle;

public class StockList extends ListActivity {

    /** Called when the activity is first created. */
	@Override
    public void onCreate(Bundle savedInstanceState) {
        super.onCreate(savedInstanceState);
        setContentView(R.layout.main);
    }
}
Now, that’s not very exciting, since all it will give us is a black screen when you try to run it. In order to provide the ListView with content to display, you need to associate a ListAdapter with the ListView. A ListAdapter is essentially the data source object that the ListView pulls its rows from. For now, let’s just display a static list of stock ticker symbols from an array. The Android framework provides you with the ArrayAdapter class that makes it straightforward to assign an array to a ListView.
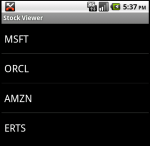
You can add the static list stock ticker symbols to the ListView by placing the following two lines of code after the setContentView call.
String[] tickerSymbols = new String[] { "MSFT", "ORCL", "AMZN", "ERTS" };
setListAdapter(new ArrayAdapter<String>(this,
                        android.R.layout.simple_list_item_1,
                        tickerSymbols));
It was extremely straightforward to add the ticker symbols to the list mostly because this example used the Android framework’s ArrayAdapter and simple_list_item_1 TextView resource. The reference to android.R.layout.simple_list_item_1 is simply a single TextView, so using this resource limits you to only displaying a string of text in the list item.
What if you wanted to display the ticker symbol and the latest quote?
One option would be to simply append the quote on to the end of the ticker symbol (i.e. MSFT – 25.48); however, that means that you’re stuck with the same formatting and layout for both pieces of information.
The second option, which would allow you to treat each piece of information uniquely in terms of layout and formatting requires some more work since neither ArrayAdapter nor simple_list_item_1 will be usable. This is because ArrayAdapter only takes in a TextView resource, and simple_list_item_1 only contains a single TextView. I’ll cover how you would do this in my next post 🙂
Final Code
<?xml version="1.0" encoding="utf-8"?>
<LinearLayout xmlns:android="http://schemas.android.com/apk/res/android"
    android:orientation="vertical"
    android:layout_width="fill_parent"
    android:layout_height="fill_parent"
    >
<ListView
    android:layout_width="fill_parent"
    android:layout_height="wrap_content"
    android:id="@android:id/list"
    />
</LinearLayout>
package com.austinrasmussen.stockviewer;

import android.app.ListActivity;
import android.os.Bundle;

public class StockList extends ListActivity {

    /** Called when the activity is first created. */
	@Override
    public void onCreate(Bundle savedInstanceState) {
        super.onCreate(savedInstanceState);
        setContentView(R.layout.main);

        String[] tickerSymbols = new String[] { "MSFT", "ORCL", "AMZN", "ERTS" };
        setListAdapter(new ArrayAdapter<String>(this,
        						android.R.layout.simple_list_item_1,
        						tickerSymbols));
    }
}
This entry was posted on Saturday, April 2nd, 2011 at 5:55 pm and is filed under Android. You can follow any responses to this entry through the RSS 2.0 feed. You can leave a response, or trackback from your own site.


